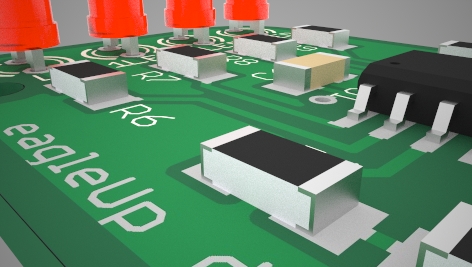
eagleUp helps designers fit their electronics into tighter enclosures by modelling accurately all the electrical and mechanical parts. The default rendering in Google Sketchup is practical and shows edges and guides, but this is not the best look to advertise your project. In this series of short articles we will demonstrate how to get stunning previews of your products, long before you get them in your hands.
Various realistic renderers exist on the market. We have set our choice on Maxwell for Google Sketchup. This renderer integrates well within Sketchup so you do not even need to open another application. All the modifications on your model have immediate effects. Rendering gets as simple as sketching.
Note : Maxwell renderer exists in multiple versions. Here we use the Sketchup plugin, in the free version. The main limitation is the max 800px wide images. This is sufficient to generate detailed previews of your project for web and presentation use. If you want higher resolution outputs you can purchase a cheap upgrade.
Download and install Maxwell for Google Sketchup (the free version is sufficient to evaluate and practice with photo-realistic rendering). Follow the instructions in the readme.txt file (copy a folder and run an installer). The interface with the renderer can be found in a new toolbar or in the Plugins menu of Sketchup.
Note: due to uncompatibility between the latest Silverlight and Sketchup it is necessary to install Silverlight 4, and not the newer version 5. You can download it here.
Pre-requirement
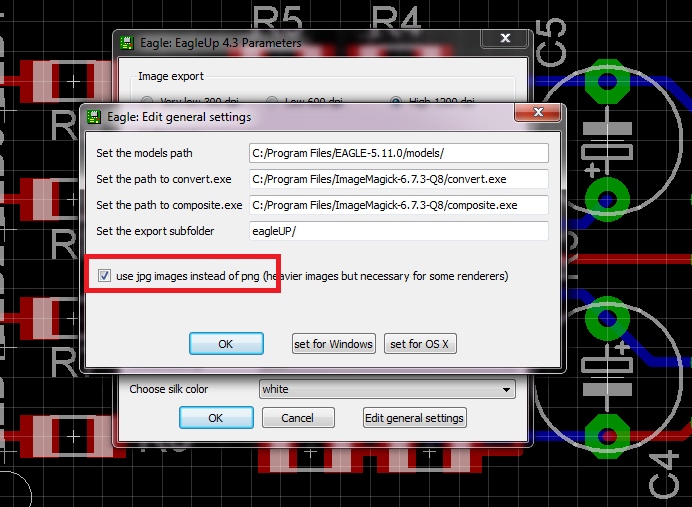
Maxwell renderer does not support the PNG images generated by eagleUp. In the general settings of eagleUp 4.3 you need to select the use jpg images instead of png. Then export and import again your project. You can leave this setting on.
Launching Maxwell Renderer
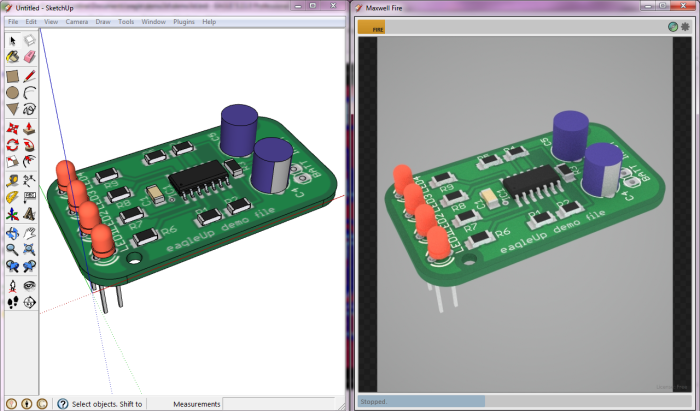
Load or import eagleUp demo project. Then click on the Fire button in the toolbar. This brings a new window that contains your rendered image. The size of the window determines the output image resolution, it is therefore easier to work on a dual screen workstation.
In Maxwell window click on the yellow Fire button. This launches the rendering. You can stop it at any time by pressing the Stop button. Photo-realistic rendering is a slow process that consumes a lot of resources. Maxwell renderer builds the image globally by increasing the detail level. At first you see a bunch of pixels, then your circuit take shape. Little by little, details appear, shadows, reflections and realistic textures. After a few minutes you should see this :
Maxwell renders exactly your Sketchup view. Rotate and zoom until you find the perfect point of view. The rendering is updated as you move around for real time feedback. You do not need to hide edges and other drawing marks. It is convenient to use the 1000:1 scale to get a fully focused image. If you work at scale 1:1 feel free to use the Plugins / Scale / Scale up 1000.
Improving the model
The model looks better but this is only the beginning. Open the scene manager (from toolbar or Plugins menu). You can adjust the lighting and materials of the scene. All your changes are updated directly so you can try all the settings.
Photo-realistic rendering is an art, and you will get the best of your models by trying different materials and parameters. Pick the material selection tool. Click in Sketchup window on your parts. You can see the material in use (silver, charcoal, …) and their properties. They are by default in automatic type. You can change to plastic or metal depending on the surfaces.
Each material can be customized to look as real as possible. Increasing the roughness will for example reduce the reflections. In the scene manager you can edit more properties for the material like textures and bump mapping. Maxwell renderer gives you free access to thousands of complex materials ready to apply. Check the material gallery and use the search engine to narrow the selection. You can download the materials and apply them with the MXM tab.
This first article is a quick introduction to photo-realistic rendering for eagleUp. Now it’s time for you to try it by yourself on your own projects and experiment with materials and textures. Feel free to share your best results in the comments ! We will open a dedicated section on the website with galleries and more tutorials.


